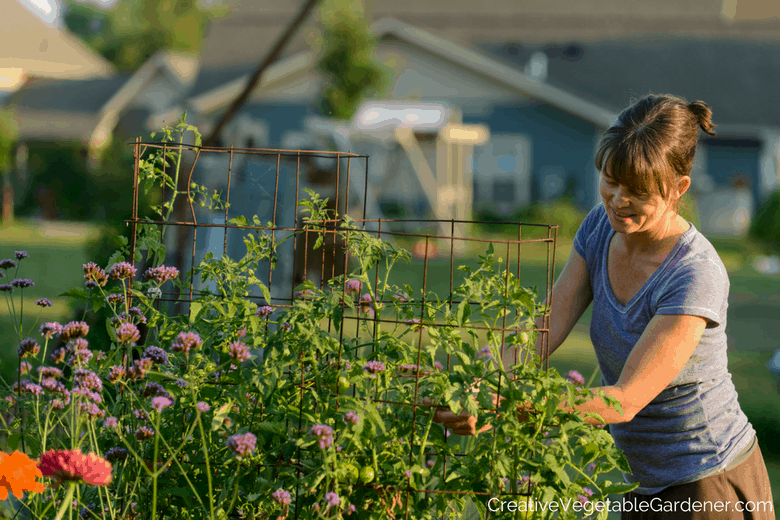
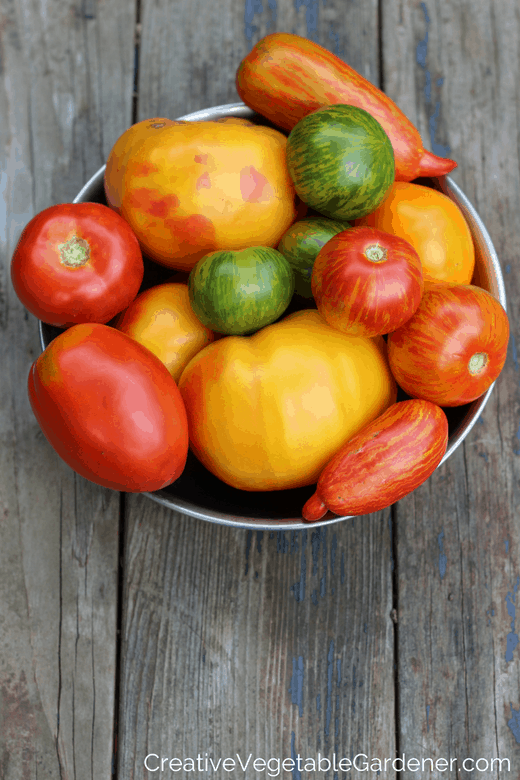
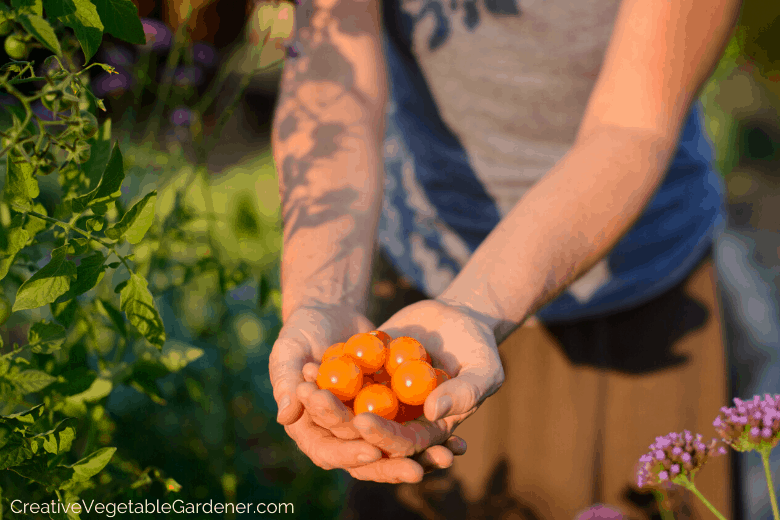
We gardeners love our tomatoes! You seldom see a vegetable garden without at least one tomato plant growing.
They’re really remarkable if you think about it. You plant a small seedling in spring, and then by the end of the summer, the plant is a huge monster producing more tomatoes than you can possibly eat.
That’s some amazing growth in a few short months!
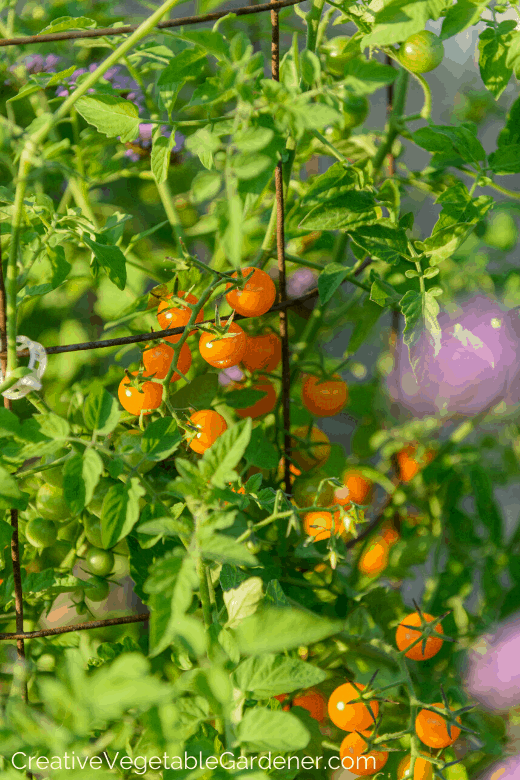
And that rapid growth and towering size of the plants mean they require trellising or caging to help them stand upright and not fall over and sprawl out on the ground.
There are many reasons to make sure your tomatoes are supported throughout the season:
Caging or trellising your tomato plants is also essential for their health and productivity. Many tomato diseases originate from the soil, so you want to make sure your plants aren’t laying down on your garden bed.
Tomato plants also prefer to remain on the drier side, and a cage will help keep the air flowing around the plant so it dries out after watering and rainstorms.
It’s way easier to harvest tomatoes from a plant that’s standing upright. Who wants to crawl around on the ground looking for ripe tomatoes every day?
And, critters like chipmunks and rabbits will be less likely to chew on your ripened fruit if it’s higher off the ground.
There are really no downsides to trellising your tomatoes!
The only challenge is finding an effective tomato cage that will help your tomatoes thrive all season long. Unfortunately, it’s more common to encounter sub-standard tomato cages. They’re everywhere.
In this article I’m sharing which cages to avoid, my favorite DIY tomato cage design, and some options for purchasing cages if you’d rather take that route.
What Tomato Cages to Avoid
Cages come in all shapes and sizes…and a lot of those shapes and sizes don’t work very well.
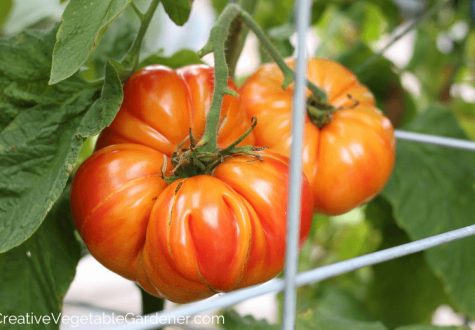
If you’ve ever grown tomatoes you know that the most common varieties are indeterminate, which means they keep growing and producing fruit until frost kills the plant.
This means the plants will most likely be over 6 feet tall by the time frost hits in most climates.
But, disturbingly, most things labeled “tomato cages” are WAY too short. The puny tomato cages you see for sale at many garden centers and hardware stores aren’t going to cut it for tomato plants that are going to get over six feet tall.
Your tomatoes are going to flop over, fall down, and probably take the cages with them.
Do not buy these cages unless you’re going to use them for determinate varieties. They are way too short.
Here’s a link to an example of a cage you should not use for an indeterminate tomato plant.![]() It’s not even 3′ tall!
It’s not even 3′ tall!

Just say no to small tomato cages.
What you’re looking for in a tomato cage is the tallest possible cage you can find, which isn’t an easy task. I’ve tried my share of tomato cages over the years and have mostly been disappointed with the results.
After a few years of frustrations, I finally settled on a design that’s performed well over the years – the DIY tomato cage.
It takes a bit of work and investment upfront, but I’ve had my cages for over 15 years and they show no signs of wearing out.
I’m going to walk you through the process of making your own DIY tomato cage so you can say goodbye to puny tomato cages that hurt your plants more than they help them!
This post contains affiliate links.
How to Make Your Own DIY Tomato Cage
After experimenting with different trellising and caging options over the years (and continuing to do so!), this DIY cage remains my favorite. They’re simple to construct, easy to install, and they last forever.
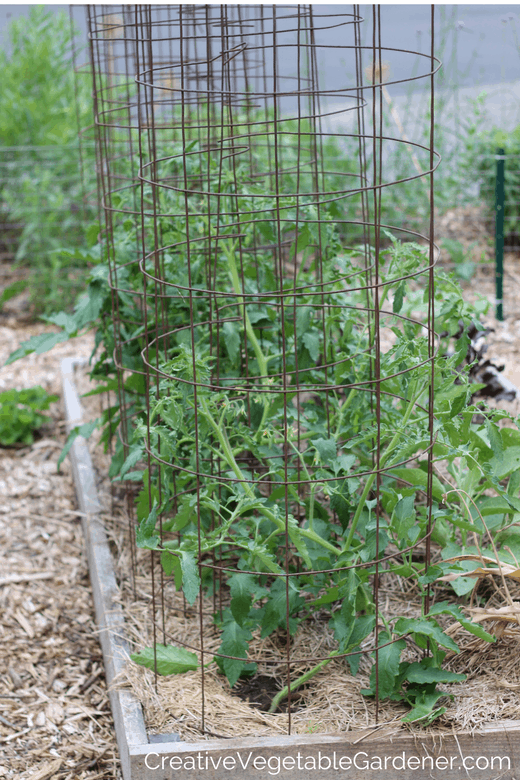
The cages are made from concrete reinforcing wire that’s rolled into cylinders (or sometimes sold in flat panels). I prefer this wire because it features big openings that allow you to easily stick your hand in to harvest even the biggest mother of all tomatoes!
Let’s walk through the step-by-step process of sourcing your materials and creating them.
Step 1: Purchase your supplies.
You’ll need to source the concrete reinforcing mesh in your area. I got mine from the local big box store.
The wire is 10 gauge, which is a very thick gauge that won’t bend easily. This is a good thing because it means your cages won’t get warped and wrinkled over the years.
The heavy gauge also makes the tomato cage heavier and more sturdy than other cages. When tomato plants get tall they weigh a lot and can easily tip over lighter cages.
It’s 5′ tall, which is significantly taller than most commercial tomato cages. The one I told you not to buy above is less than 3′ tall!
Note that the openings (or individual squares that make up the wire roll) are 6″ x 6″. This large opening allows you to easily access ripe tomatoes for harvest.
It comes in various length rolls. The biggest roll, 5′ x 150′, is very heavy to move, so you should bring a friend with you. This one should make 20+ cages.
If you have a group of gardening friends, this would be a great excuse for a DIY tomato cage making party!
You might see lots of other wire rolls while shopping at the store. These are often labeled as various types of fencing. In a pinch, you might be able to construct your cages from other types of wire, but try to buy the thickest wire you can find and ideally one that has bigger openings you can stick your hand through.
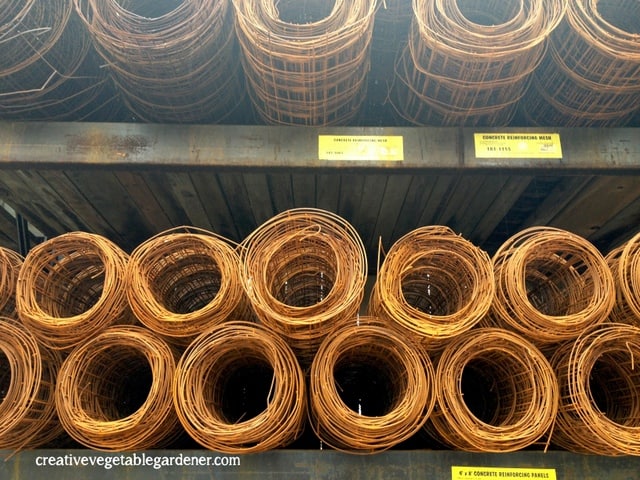 Concrete reinforcing wire at my local big box store.
The only other supplies you need for constructing your tomato cages are beefy bolt cutters and thick work gloves so you don’t cut your hands on the wire. If you have a handy neighbor or family member you can probably borrow a pair of bolt cutters from them.
Step 2: Decide on cage size.
The steps going forward are much easier to tackle if you have another person to assist you. Recruit a friend who also grows tomatoes and have a DIY tomato cage making party!
Fully unroll the wire and hook the end around or to something to keep it from rolling back up and smacking you in the shin. (Somebody I know did that once…) I pounded a metal post into the ground and hooked one end of the roll over it to hold it in place.
Take a few minutes to decide how large a circumference you want each cage to be. My cages have 9 squares in each and this works perfectly with the 18 inch spacing of my tomato plants.
You can count the total number of squares going down the length of the entire roll to help you calculate how many cages you’ll be able to cut from it.
Step 3: Cut a sample tomato cage.
I’d suggest making one sample to start to see how you like the size. Would you prefer it to be bigger or smaller? If so, you can easily tweak the rest of the cages to your liking.
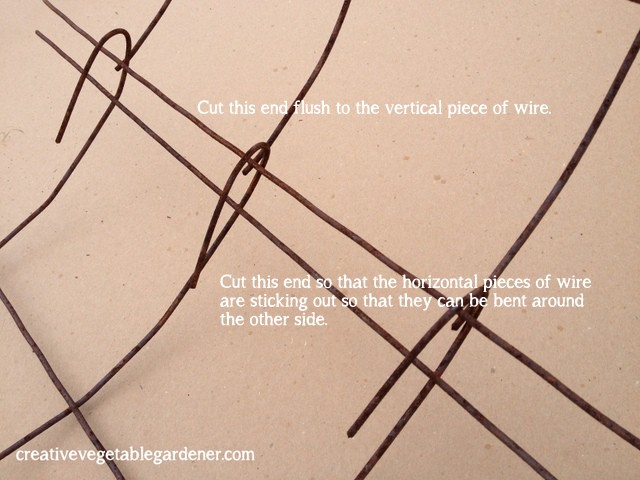
Cut out the cage by using the bolt cutters to work your way down the width of the wire. You’ll want to leave one side cut flush to the vertical piece running down the length and one side cut with the horizontal pieces sticking out so you can bend them over to close the cylinder.
This sets you up for the next step.
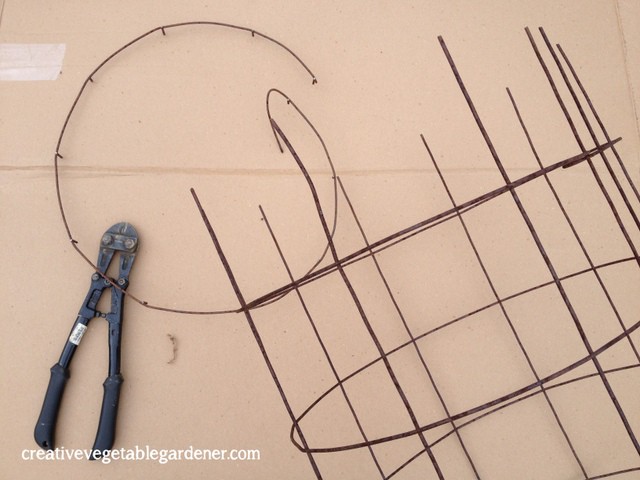
Step 4: Roll it into a cylinder.
Roll the piece you just cut out into a cylinder. Bend the long horizontal pieces on the one side of the piece around the end that’s cut flush to hook it together in a circle. See photo above.
Step 5: Cut bottom stakes.
Once you have your wire secured in a cylinder, cut off the bottom ring to create stakes to stabilize the cage in the garden bed. See photo below.
Now you have your sample DIY tomato cage!
Step 6: Test your sample.
Take your sample over to your garden and push the stakes into the soil. How do you like it? Does it work with your tomato spacing? Would you like a bigger or smaller cage?
If you want to make changes, cut out a second sample and test it out. Once you’ve settled on a cage design you like, continue repeating steps 3-5 until you’ve created as many tomato cages as you need for your garden.
I recommend using the entire roll, even if it makes more cages than you need. That way you don’t have to deal with storing it somewhere.
You can give your extra cages to a gardening friend or neighbor, or place them on the curb and someone will scoop them right up!
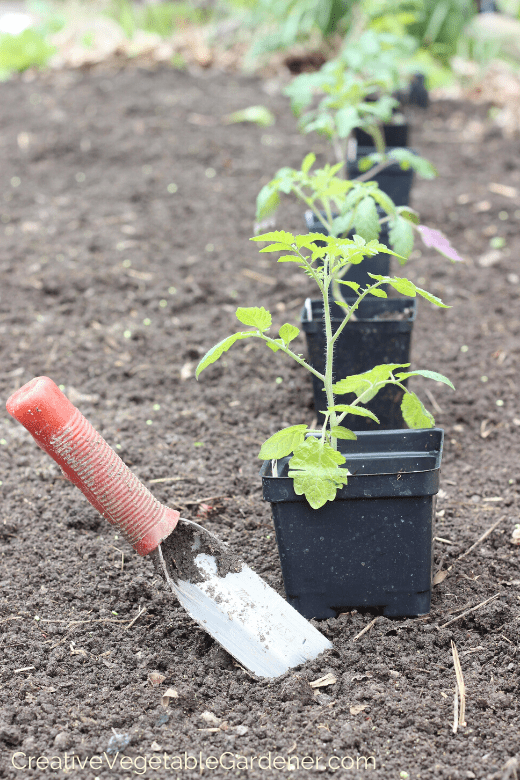
Step 7: Plant your tomatoes.
If you haven’t planted your tomatoes yet, and it’s past your average last frost date, it’s time! There are almost as many suggestions for spacing as there are tomato varieties.
I plant mine in double rows down the length of the bed with 18″ between each plant. This is fairly tight spacing, but my cages and some strategic pruning allows me to plant them this close.
Read the 8 steps for expertly planting a seedling here.
Step 8: Mulch your tomatoes.
Immediately mulch your tomatoes after planting! This will help cut down on soil-borne diseases spreading up onto your plants when it rains, reduce the amount you have to water, suppress the majority of weeds (less work – yay!), and break down and add organic matter to your soil over time.
I recommend keeping your entire garden mulched all year round for the above reasons. You can read more about the benefits of mulch and what kinds to use in your vegetable garden here.
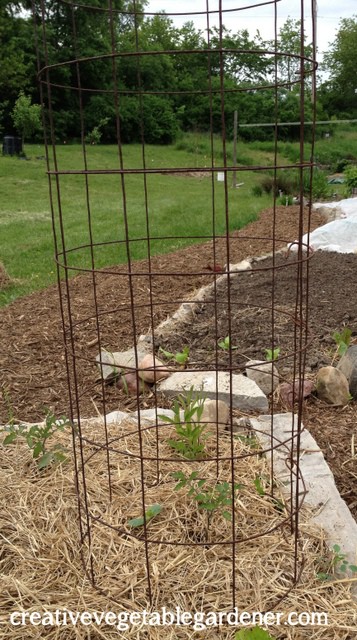
Step 9: Install your DIY tomato cages.
After planting, simply lower a cage over each tomato plant and use your foot to drive the stakes into the ground. In my garden, they usually don’t need any extra reinforcement to keep them stable throughout the season.
If you live in a very windy area you might want to drive a metal t-post into the ground and secure the cage to it. You can also use twine or zip ties to secure the cages to one another for extra stability.
When tomato plants grow very tall towards the end of the season they can get a bit top-heavy and are more likely to tip over your cages.
Step 10: Stand back and admire your work!
Ta-da! You did it. That was pretty simple, right?!
From here on out, there’s not much you need to do. The tomato plants tend to grow up naturally into the cage. Sometimes I tuck back into the cage a stray tomato sucker that’s reaching too far out of bounds.
You can also use twine or garden clips to fasten a heavily fruit-laden branch to the cage so it doesn’t break while they’re ripening.

Pros & Cons of This DIY Tomato Cage Design
Of course, there are no perfect trellises or cages. Every one I’ve tried has its own pros and cons. The benefits of this tomato cage are:
- easy installation once you get the cages built
- low maintenance after the cages are on the plants
- the longevity of the cages
These three things far outweigh the cons for me. I built my cages one summer over 15 years ago and I’m still using them to this day!

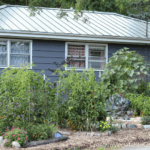
Well into the season and the plants are still looking neat and tidy.
The downsides of these DIY tomato cages are:
- the upfront cost of purchasing the wire (although the price per cage is pretty low)
- storage over the winter when you’re not using them – they take up a lot of room
- they can tip over in high wind areas if they’re not secured
In my opinion, the upfront cost is worth it because they last so long. Their storage is somewhat inconvenient, especially if you have a small yard. I leave my cages standing in a back corner of my yard when they’re not in use.
Other Options for Tomato Cages & Trellises
If you’ve read all the way down to this point and I still haven’t convinced you that DIY tomato cages are the way to go, then you do have several options for commercially made cages.
Texas Tomato Cage
I bought a couple of this tomato cage design a few years ago to test it out. After using it for a few years I can confidently declare it ranks right up there as a close tie to the design I use.
In some ways, it’s better and in others, it’s not quite as good as the DIY design. Note: I’m not affiliated with this company in any way.
The pros are:
- Without the extension, it’s a full 12 inches taller than my DIY tomato cage (6′ vs. 5′). And with the extension, the cage is 8′ tall!
- It’s collapsible, which means you can store many more in a small space. I hang mine up in the garage on a hook.
- It has long stakes at the bottom which help secure it into the soil.
The cons are:
- Cost: They’re $169 for a pack of three medium cages with extensions. You can purchase a whole roll of wire for that prices and make 20+ DIY cages.
- Size: I ordered the medium size and that’s still too wide of a diameter for my tight tomato spacing.
If you only grow a few tomato plants these might be the best option for you. But, if you plant a lot of tomatoes, you may want to make your own.

The Big EZ Tomato Cage
I haven’t tried these, but they look very similar to the Texas Tomato Cage, although a bit shorter at 48″. As we discussed, short tomato cages aren’t ideal.
They’re made in the US, which is a nice feature. Read more about them out here.
Square Extra Tall Tomato Cage
I have a similar tomato cage as this, but not from the same company. Gardener’s Supply is a reputable company based in Vermont, so you can feel confident in purchasing cages from them.
Even at extra tall, they’re only 53″ when installed. The panels come apart, so you can lay them flat in storage, which is a great feature if you don’t have a lot of space. You can order them in green or red, which is fun!
Livestock Panel Trellis
I plant my cherry tomatoes on the DIY livestock panel trellises (both arched and flat) I’ve created for my garden. These would be a good option if you don’t grow that many tomato plants.
You might be able to fit all of your plants on just these trellises and they’re super tall, so there’s plenty of room for the plants to grow up.
Read my step-by-step directions and three options for a cattle panel trellis.
Additional Tomato Notes & Resources
Which tomato type to cage
When we’re talking about caging and trellising tomatoes, we’re specifically referring to indeterminate tomato varieties. These varieties keep putting on new growth throughout the season, which means they’re continually getting taller, wider, and producing new tomatoes.
These are the tomatoes you need to trellis and cage.
Determinate tomato varieties grow to a shorter height and then produce all of their fruit during a short window. Depending on the variety you often don’t need to cage or trellis them at all.
If you do want to cage them, you can use one of the “forbidden” cages I dissuaded you from purchasing in the beginning of this post.
If you’re not sure which kinds of tomato you have you need to look up the variety online to find out whether it’s indeterminate or determinate.
High wind area concerns
If your garden is in an area that’s exposed to wind, there is a chance your cages will tip over once the tomatoes get tall and heavy. You’ll want to secure them with t-posts pounded into the ground or tie them to a fence or other structure. You can put one post between every two plants and use twine or zip ties to secure them to the post.
How to use tomato cages
I have an extensive article on why and how to use tomato cages for better harvests.
More tomato tips & techniques
I recommend pruning indeterminate tomatoes several times after planting.
If you love tomatoes and want to keep reading about them (who doesn’t?!), I’ve written several articles here:
- How to choose which tomatoes to grow
- Ways to prevent tomato disease in your garden
- Save time preserving your tomatoes with this quick hack
Since tomatoes are such a beloved vegetable plant for so many of us, it’s definitely worth it to invest a little extra time, energy, and money to make sure you have a great cage that will keep your plant healthy, off the ground, and producing lots of gorgeous tomatoes all season long.
SHARE IT ON PINTEREST


Comments
We’ve used this method for years. We have a windy site and the plants quickly become top heavy, so we hammer two rebar rods down opposite sides of each cage and about a foot into the ground to keep them in place. Failure to do this almost always results in epic tipovers since the tomatoes in my garden always outgrow the cages.
Hi Betsy – How do you attached the rebar to the cages?
Use zip locks to tie together. Also, use zip locks when making the cages. Cut both sides flush and zip lock together. Avoids having sharp ends of the wire and at end of year you simply cut the zip locks and store cages flat.
I love that idea, Russel! It would go a long way towards making them much easier to store. Thanks for the suggestion!
I like the v shaped tomato trellis from GArden Supply. I bought my first five from them and then my husband made the rest I needed from rebar as they can be expensive. But a great design. Never fall over and store easily.
Margie
Margie – Do you have a link to the trellis you use that you can post here so we can all check it out?
I love this idea. I have always used vertical 2x2s with a point at one end to drive it into the ground, and then tied the plants to it as they grew up. I think the up front time investment in doing these cages might be well worth trading for the time spent tying up plants every 1/2-1 week. We already have a “storage corner”, so what’s a few more things added to it!
Jordana – Thanks for your comment! I used to have trellises that forced me to come back every few weeks to tie up and it’s hard to keep up! I like these because I don’t have to think about them again.
Brillant .. thank you for sharing. I’ve been battling those tomato cages for too many years- they drive me batty! I can’t wait to give this design a try.
Thanks, Bren! Battling is a good word – those cages often take a lot of modification to work properly. Let me know how it goes!
Use your old tomato cages for your pepper plants. Mine benefit from the stability of the cage even though they are not such heavy plants. Works best for chili type peppers.
That’s a great idea, Regina! I have done that in the past, but now use bamboo stakes to hold my peppers up.
Going to try a combination of the wire only not cut it! Tomato wall with a “Florida” type weave….I dunno why ANYBODY buys those dang stupid cages! But we scored sheep panels at a yard sale for $2…enough for the maters AND cukes!
Livestock panels are great – your scored a deal on those! I do use them for a few tomatoes as well as peas and beans. Keep us posted how they work out!
I love your cages. I struggle every year on how to keep my tomatoes from falling over lol.
I just designed one using stuff I had around my farm. http://bit.ly/2136pIq
If mine doesn’t work out, I’ll be trying yours out!
The nice thing is that tomatoes get so huge is such a short time. The bad thing – they get so huge! Thanks for sharing your DIY cage.
I am ready to give this a shot. So when you say you bought a 150ft roll and it makes approx 20 cages I presume you cut them in lengths of 7.5ft if my math is correct. Please confirm.
Not sure, John. I didn’t measure the lengths, I counted the squares. I always end at the edge of a square.
[…] Want to see how to make the best tomato trellis ever? I show you how in this popular post. […]
[…] Empress of Dirt is building trellises for climbing veggies, Creative vegetable gardener makes sturdy tomato cages from cattle panels and Flower Patch Farmhouse has plants to make a beautiful garden […]
I have used this method for years. They are also great for climbing plans such cucumbers and squash.
I made my own tomato cages like this 3 years ago, and they are AWESOME! I’d never go back to the flimsy things they sell in the store. I fill them with shredded leaves in the fall and use them as mini-compost bins so I don’t have to store them in the garage over the winter.
That’s a great idea, Vicki! I leave mine out in the yard, but now I see I could actually be using them for something more practical like compost. I may just steal your idea.
I love the composting idea!
Years ago I found the Ultomato cage. I found them in a store once, then order online or with Home Depot/Ace Hardware if I need to. They have lasted 10? years, use 5 foot coated steel stakes, and they come with heavy duty plastic connecting bars. The beauty of them is you can move the connectors as the plant grows to support it. It is super easy to store and takes up only the room the stakes take. I store mine in a tall kitchen wastebasket standing on end – light and compact. Since we made a huge garden space (32′ x 20′?) I use extra 5 foot stakes with reflecting ribbon tied on the tops throughout the garden space which keeps deer out. Even at night the ribbon reflects enough city light to spook the deer away. I use 8-10 in this space and store the stakes with my Ultomato stakes. Happy gardening!
My boyfriend is outdoorish and brought home a roll of fencing from the woods 3 years ago. The farmer was glad to let us repurpose it .We cut the bottom horizontal wire for stakes and zip tied together so we could store them off season. We still have the original 30 cages.
Such a good find, Linda! Glad to hear they’re working well for you.
My grandpa made cages like this 30 some years ago! He was a construction worker and he made them out of leftover end pieces- so his were free! I have 5 of them and they are still going strong! So much better than tying them to cattle panel, like I have to do with the rest of my plants. Thanks for this post, I’ve never seen anybody else make these cages.
I’ve been using cages like this for several years. To minimize the storage space, I made half of the cages one section smaller. So now I have five 9″ diameter cages and five ~8″ in diameter. I store the smaller ones inside the larger.
I LOVE this idea, Craig. It would really cut down on the storage space, which I think is one of the negatives of this method.
I have always used one inch pvc piping to tie my plants to. I will be making cages this year. PVC does not rot or rust and is strong enough to hold the plants. They are not damaged if left out all winter till the next season. I tie my plants to the stakes with rubberized material I bought on amazon and at the end of the season just cut it off and toss it out. The 120 yard roll is not that expensive and it expands as the plant grows. Here is what I bought.
KLOUD City Different Length and Width Elastic Cord/Elastic Band/Elastic Rope/Bungee (White 120Y Length 5mm Width and Silver treezer)
Sold by: Kloud City
$10.59
Thanks for the tips!
Thanks for sharing your tips, Rick!
I have these except mine are made from hog wire. It has the same strength and dimensions as the rebar but it doesn’t rust. I also use these in my raspberry bed ( the bramble kind)to keep them upright and
healthy.
Hi Betsy. I grow beefsteaks in 5 gallon buckets on a rooftop in Ft. Lauderdale FL. Just a comment on those chintzy tomato cages. They are great for training your baby plants as long as you don’t tie any stems to them. Once they reach the top ring it’s time to spend some dough and invest in the chicken wire you suggested. And here’s another tip: Once you cut the mesh to size, spray it with a coat of clear polyurethane or else your cage will rust within a week. I’m using 4′ trellises now and will be incorporating a mesh tube on top of the trellis soon.
Thanks for the tips, Patrick!