
Fermented foods are all the rage these days. You can find them everywhere – farmers markets, grocery stores, restaurant menus, and even on your friend’s kitchen countertop (that is if you’re friends with me!).
If you eat and drink wine, beer, sauerkraut, vinegar, or miso I have news for you — you’re already eating fermented vegetables (and fruits).
The good news is that fermented foods are extremely healthy for you, but the bad news is some of the specialty fermented foods can be pretty pricey at the store. Luckily, even though fermentation might sound like a fancy and difficult process, it’s actually incredibly simple to make your own fermented vegetables at home.
In fact, I’ve found it to be more straightforward and quicker than canning, freezing, and dehydrating.
Let’s talk about the easy process of fermentation and then learn how to make fermented vegetables at home.

This post contains affiliate links.
Fermented Vegetables – Your Gut’s Best Friend
Science is still in the beginning stages of understanding the complex ecosystem that exists in our intestinal tract. An astounding 70% of your immune system is located in your gut, along with 300-500 different species of bacteria.
Did you know that the gut has its own “brain”? With its own set of neurons, it can regulate its functions without the need for connection to the brain. Amazing!
You’ve probably heard that one way to encourage gut health is to regularly ingest probiotics, which are live microorganisms that promote healthy flora in your intestines (found in things like yogurt or acidophilus capsules). Fermented foods are teaming with probiotics, as well as B and C vitamins.
In fact, as the fermentation process starts to break down the vegetables it makes the nutrients more available for our bodies to absorb.
What is Fermentation?
All fresh fruits and vegetables are natural hosts to all kinds of microorganisms such as bacteria, yeasts, and molds. Through fermentation, we encourage the beneficial bacteria to participate in the process of preserving our vegetables.
We create an optimal environment for them to grow, which prevents any harmful bacteria from also growing. These bacteria, yeasts, and molds start breaking down the vegetables, freeing up the vitamins and minerals for our bodies to absorb later when we eat our fermented vegetables.
The fermentation process is pretty quick, too. Most of the recipes I use in my kitchen can be ready in one to three weeks depending on how you like your finished ferments to taste.
The finished product also has a very long storage life in your fridge – up to one or two years depending on the recipe. That means you can ferments vegetables during the harvest season and then potentially eat them all winter long.
How to Make Fermented Vegetables
Step 1: Understand the process.
I’ll give an overview of how to make fermented vegetables, but the best way to start is to grab a book about fermentation and make sure you understand the entire process from beginning to end. This will give you the confidence that you can follow any recipe for any vegetable coming out of your garden.
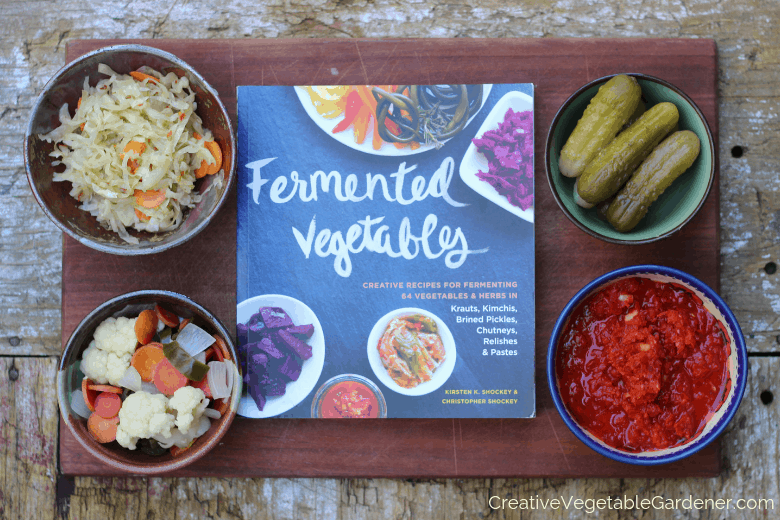
When I was first starting out I used several recipes from the internet with mixed success. Eventually, gardener friends who are quite the fermentistas recommended I purchase the book Fermented Vegetables: Creative Recipes for Fermenting 64 Vegetables & Herbs, by Kirsten and Christopher Shockey.
They’re very well-known in the fermenting world and every recipe I’ve tried from their book has been super tasty. I encourage you to check it out of your local library or purchase a copy before you get started on your fermenting journey.
And if you like spicy food, they have another book for the adventurous eater called Fiery Ferments.
Step 2: Pick a recipe.
How do you choose which ferment to start with? A common beginner recipe is sauerkraut. That was my first foray into fermenting and I still make a Latin American version of it, called curtido, to this day. It’s easy and tasty, and cabbage is inexpensive at the grocery store or farmers market, so you’re not risking much in terms of food costs.
Another option is to buy a few samples of different fermented foods from your local grocery store and have a taste test at home. And if there’s already a fermented food you like to eat on a regular basis, I suggest starting with that.
Discover five no-fail fermented food recipes for beginners in this post.
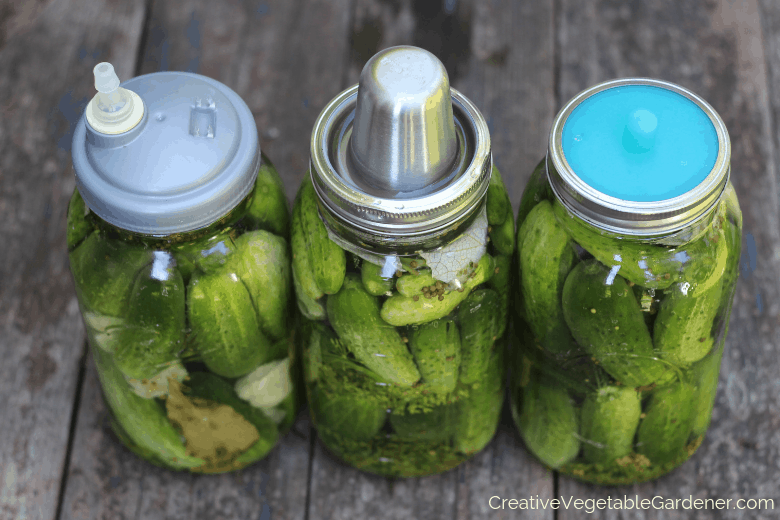
Trying out different fermentation lids.
Step 3: Gather your supplies.
Besides being a pretty straightforward process, the other thing I like about fermenting is that it doesn’t require a lot of equipment. In the beginning, you can mostly get by with what you have at home. Here’s what’s on my supply list:
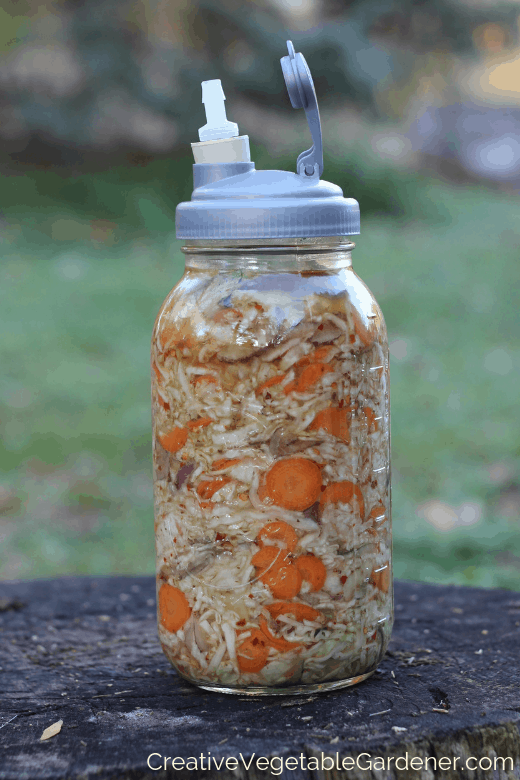
Wide Mouth Glass Canning Jars: I like to make larger batches of ferments because we eat them quickly, so I use half gallon jars for all of my recipes. You could start with quarts and upgrade to half gallons later once you’re totally addicted.
Airlocks/Lids: During the fermentation process you want to let the CO2 out of the jar. In the book, Fermented Vegetables, they stress that you don’t need a special fermenting lid and explain how to use a loose canning lid and ring instead. Unfortunately, this means you need to pay close attention to your fermenting vegetables and “burp” them occasionally.
After doing this for one round, I decided it was much easier to purchase a few fermenting lids so I could essentially ignore my fermenting jars until they were finished.
I’ve tried several of the brands on the market and recommend ReCAP Mason Jars. They’ve changed their design slightly from when I wrote this article, so it looks a little different than the photo.
You’ll need to purchase this Fermentation Six Piece Starter Kit. Make sure you choose wide or regular mouth. I suggest just using wide mouth jars for fermenting. It’s hard to only buy one lid, because the lid and airlocks come in 3 packs.
As you’ll learn when you get into fermenting, it’s convenient to have a hard-topped lid so you can use it to help wedge something under it to keep the vegetables underneath the liquid. That’s why I like these lids the best. (More on that next!)
I also have two other kinds of lids: Masontops Pickle Pipes for veggies that tend to keep themselves underneath the brine pretty easily (pickles, cauliflower), and this fancy stainless steel lid from Kraut Source ![]() that was developed during a Kickstarter campaign.
that was developed during a Kickstarter campaign.
Follower/Weight: There’s a saying in fermenting that goes, “Under the brine and all will be fine.” Once you get the veggies into the jar you need to have a way to keep them underneath the liquid.
In the Fermented Vegetables book, the authors teach you how to use a ziploc bag for this, which I did the first few times. I found this method to be cumbersome and it required too much monitoring.
Now, I pair the reCAP lids with a 4oz jelly jar instead. This part will make more sense once you get started fermenting. There are also glass weights, but I haven’t tried them yet.
If you’re not sure if you’ll like fermenting then just go with the ziploc bag method they talk about in the book for now.
Salt: I already use bulk sea salt![]() in all of my cooking, so that’s what I use in my fermenting recipes as well. You’ll go through a lot of salt, so if you can buy it in bulk from a local grocery store that’s what I’d recommend. Not recommended: refined, iodized, or kosher pickling salt.
in all of my cooking, so that’s what I use in my fermenting recipes as well. You’ll go through a lot of salt, so if you can buy it in bulk from a local grocery store that’s what I’d recommend. Not recommended: refined, iodized, or kosher pickling salt.
Spices: Most of the fermented vegetable recipes call for several spices. I buy mine in bulk from my local food co-op so I can purchase just what I need and not waste any.
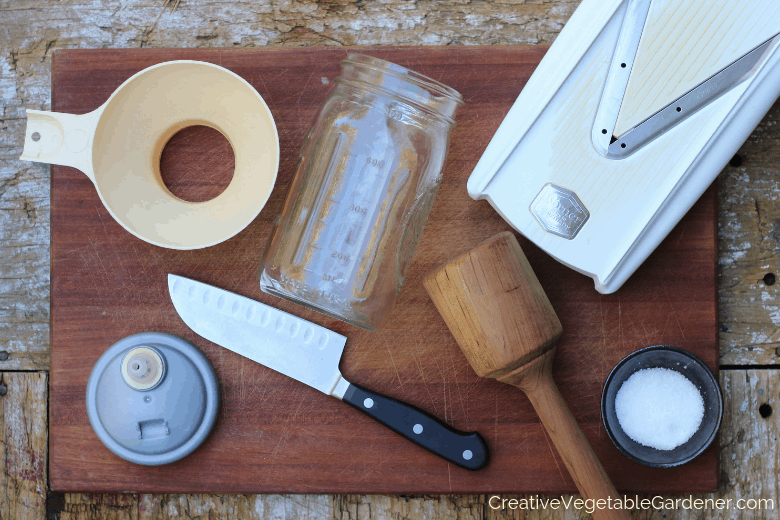
Cutting board: You’ll do lots of chopping during this process!
Sharp knife: Wustof for life!
Wide mouth funnel: If you already have one in your kitchen![]() you’ll find it helpful for getting the ferment into the jars without making a mess.
you’ll find it helpful for getting the ferment into the jars without making a mess.
Large mixing bowl: You’ll need to have plenty of space to mix up the spices, salt, and veggies.

OPTIONAL:
Mandoline: I already had a mandoline for slicing and dicing, and I often use it during the fermenting process to help things go a little more quickly. I have this one.
Tamper/Packer: When you’re transferring the ferment into the jars you need to try to pack it down as much as possible so there’s not a lot of air in the jar. The above mentioned fermentista friends gifted us a handmade wooden tamper that’s super handy for packing the vegetables tightly into the jars. Here’s a similar one.
If you want to get by with purchasing as little as possible, or you want to try fermenting first to see if you like it before spending any money, the only things you really need are the Fermented Vegetables book (from the library!), glass jars, cutting board and knife, bowl, salt, spices, and a ziploc sandwich bag if you’re not going to buy the fermentation lids.
If you’re pretty sure you’re going to like fermenting, or you’ve already tried it and want to upgrade, I’d highly recommend purchasing half gallon jars, the reCAP kit and tamper.
Step 4: Get to work!
The process goes fairly quickly once you have all of your vegetables and supplies laid out in your kitchen. The book walks you through each recipe step by step and it will differ depending on which recipe you’re working on.
Step 5: Patience is a virtue.
Or, set it and forget it. Most ferments will take at least one to two weeks until they’re sufficiently broken down, but it depends on the recipe. You can taste them at any time though, and when you like the flavor and texture you can declare them done!

Step 6: Enjoy!
When they’re finished you’ll remove the fermentation lids and replace them with regular canning lids and rings. Now they can live in the fridge where they’ll keep fermenting very slowly and will store for at least a year and sometimes two. Although I guarantee you’ll eat them way faster than that!
I hope this post gave you a glimpse into how easy it can be to create your own healthy and tasty fermented vegetables at home.
Believe me, once you read the Fermented Vegetables book, understand the process, try one or two ferments yourself, and taste the fruits of your labor, you’ll be joining the ranks of the most passionate fermentistas out there.
And then your counter top will be filled with various fermented vegetable projects at any given time…just like mine!

Other Resources for Preserving Vegetables
MASTERCLASS: This winter, imagine grabbing all the ingredients you need for a meal right from your pantry without having to go to the grocery store! With a few simple techniques, you can continue to enjoy food grown in your own garden (or purchased from the farmers market) throughout the long, cold months of winter.
This class will teach you how to make every harvest last longer by quickly and easily preserving vegetables at the height of their season. You’ll love the feeling of sitting down to a meal and knowing a large part of it came from your garden!
BOOK:

Preserving some of your excess produce is the best way to make your garden harvests last all year. And, preserving doesn’t have to be difficult or take up a lot of time.
My book, Super Easy Food Preserving, features the simplest and quickest way to preserve each fruit, vegetable, and herb. Read more about it here.


Comments
Do you know if it is important to keep the veggies completely under the brine once the fermenting process is over and the veggies are in cold storage?