A few years ago my sister, a budding gardener, called me from Philadelphia, where she was thinking about growing onions, and asked me, “When you plant one onion, how many onions do you get?”
Wow! This one question completely re-framed things for me. I had never quite thought about each vegetable in this way.
And when I told her she would get one onion from planting one onion, she said, “Oh, then I’m not going to plant them. It won’t be worth it.”
Of course I had to laugh when she said this, because one of my favorite yearly rituals is growing onions!
But, our exchange was a wonderful reminder that what’s “worth it” to grow in our gardens is a purely personal decision.
Since you’re here reading this post, I’m going to assume you feel enthusiastic about growing onions this season.
I don’t know about you, but most of the recipes we cook at home start with onions and garlic in the pan with a little olive oil. We cook most nights of the week, so that means we use a lot of onions throughout the year.
That’s why they’re one of my favorite vegetables to grow.
I usually plant between 300-500 (mostly storage) onions so we can eat them all winter long. A fun challenge I set for myself is to never have to buy onions at the store.
Some years are more successful than others!
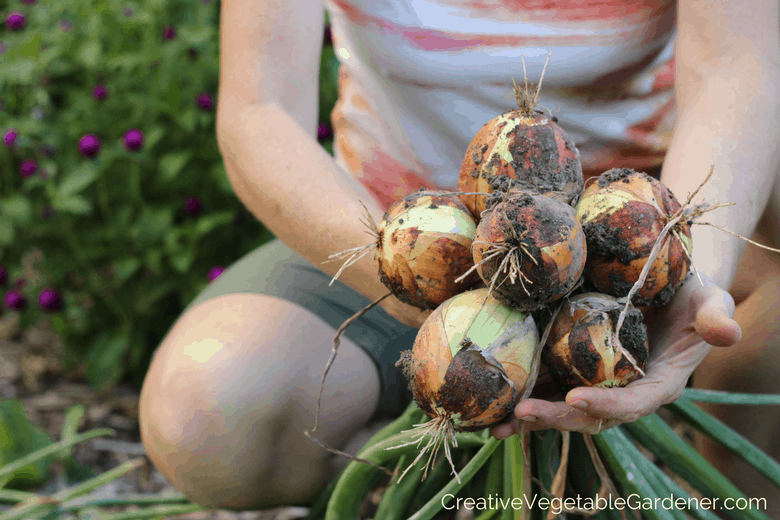
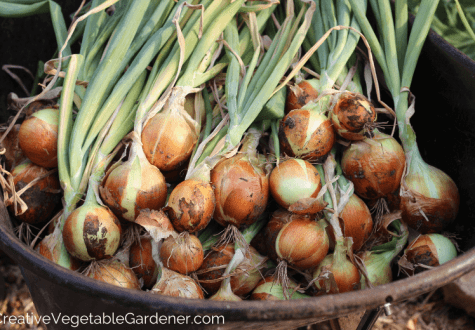
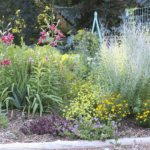
One thing I can say is that over the years, I’ve mastered the art of growing amazing onions. Every July, my onion harvest is pretty epic for a home garden, as you can see from the photos in this post.
Unfortunately, a lot of gardeners confide in me that they struggle to grow onions successfully. I understand, because there are some very specific techniques you need to practice in order to grow onions to brag about.
The goals of this post are to share the best practices for growing onions and get you excited about including them in your garden plan this spring. And you don’t have to grow 500 like me to join the onion enthusiast club!
This post contains affiliate links.
8 Tips for Growing Great Onions
#1: Plant Early
If you’re having trouble with your onions producing nice big bulbs, it could be because you’re planting them too late. The amount of daylight your garden gets during onion growing season will dictate when they start forming a bulb.
If you garden in northern latitudes, your summer days are much longer than gardeners to the south of you. That means you should plant long day onions.
These onions start forming a bulb when the days are 14-16 hours long. This type is best for latitudes between 37-47 degrees in the US.
I live in Wisconsin in zone 5, so I usually notice my onions starting to really produce a bulb around the summer solstice.
By then, my garden is receiving over 15 hours of sunlight every day. See, there are some advantages to living in the north!
Short day onions are best suited for southern gardens located between 25-35 degrees. They’ll start producing a bulb when the day length is 10-12 hours.
There are also intermediate day onions, which you should plant if you live between 32-42 degrees latitude. They’ll start the process of bulbing up when the day length is between 12-14 hours.
Johnny’s Selected Seeds has an informative map of the US highlighting which areas should grow each type of onion here.
Why does this matter? As I wrote above, in zone 5 here in Wisconsin, my onions really start growing bulbs around the summer solstice. The amount and size of the green leaves on the plant at that time will help determine the size of the bulb I harvest in July.
Let me repeat that – if your onion leaves are puny, you’ll get puny onion bulbs.
That’s why it’s critical to plant your onions early – four to six weeks before your average last frost. If you plant them too late in spring, the onions won’t have time to grow enough green leaves to encourage large bulbs.
This is one of the most common reasons gardeners aren’t happy with their onion size. That’s why I put it first on the list. If you don’t know your average last frost, enter your zip code into this site to find out.
Depending on the weather, I usually plant my onions the third week in April.
#2: Evaluate Your Options for Planting Onions
When you’re making your onion growing plans it’s important to understand the three options for selecting plants.
Option #1: Start Your Own Seeds
I’ve gotten the best results by far when I’ve started my own onions seeds in the winter. Starting your own seeds gives you the ability to pick exactly the right kinds of onions for your situation – long day, short day, storage, sweet, red, yellow and more.
And you’ll have access to a plethora of interesting varieties – way more than you would likely find at your local nursery. Onions are one of the first seeds to get started in the winter, about 10-12 weeks before your last frost.
In my house onions kick of the seed starting season around the last week in February.
If you’ve never started seeds you’re really missing out on one of the most fun parts of gardening. You can find lots of seed starting inspiration here.
Option #2: Buy Plants
In this option we’re talking about onion plants, not sets. If you’re not going to start your own plants, this is a good second option.
When you buy onion plants from a farmer or nursery, they’re grown from seeds that were started a few months before, most likely in a greenhouse.
This makes them superior to onion sets, which we’ll talk more about below. The benefit of planting a good-sized onion plant is that it can compete with the weeds better (onion hate weeds!) and will usually produce a better sized bulb than an onion set.
You might be able to find onion plants at a local nursery or farmers market. Buying from a local farmer is always the best option because you can check to make sure the varieties being sold do well in your area.
If you’re buying from a store, use your phone to look up the varieties and confirm they grow well in your region.
You can also order plants online. I’ve purchased onion plants from Dixondale Farms in the past and was very happy with the results. They even carry some of my favorite varieties.
Never buy onions that don’t have any variety listed, or just say red, white, or yellow on the tag. Who knows what you’re getting!
Option #3: Buy Onion Sets
Onion sets look like tiny little onion bulbs. They are generally started the previous year. This means when you plant them it’s technically their second season growing outside.
This is problematic because onions are biennial, which means they flower in the second year.
A flowering onion is very pretty, but it’s not going to produce a very big bulb because it’ll be focusing all of its energy on that flower. If you’ve ever planted onion sets and been surprised when they flower, now you know why!
At my local nursery the onion sets are never labeled with a variety. But instead are named Red, White, and Yellow. Variety is important, so no-name onions are another reason to stay away from onion sets.
If you’re committed to trying to grow quality onions I highly recommend sticking to the first two options in this list.
And a final note, you cannot plant onion seeds directly into the ground in spring. They won’t have enough time to turn into bulbs. You need to use a plant or a set.
#3: Choose the Best Varieties for Your Garden
There are a few different characteristics of onions to understand before you pick which varieties you want to grow.
Step 1: Choose the Right Type for Your Latitude
As we discussed in tip #1, you need to choose a variety that’s appropriate for your latitude. Your choices are long, intermediate, or short day. You can use this map of the US here assist you in figuring out the best type for your garden.
Step 2: Choose Fresh or Storage Onions
The second step is to think about when you want to use your onions. Do you want to eat them in the weeks following harvest? Or do you want to store them long term so you can use them in favorite recipes all winter long?
If you’re only growing a handful of onions in your garden you probably want to choose a fresh eating variety. These tend to be sweeter and have more water content, but they don’t store well over the long term.
I usually grow one variety of sweet, non-storage onion in my garden. I keep them separate and try to use them up before my other onions, ideally during the month or two following their harvest.
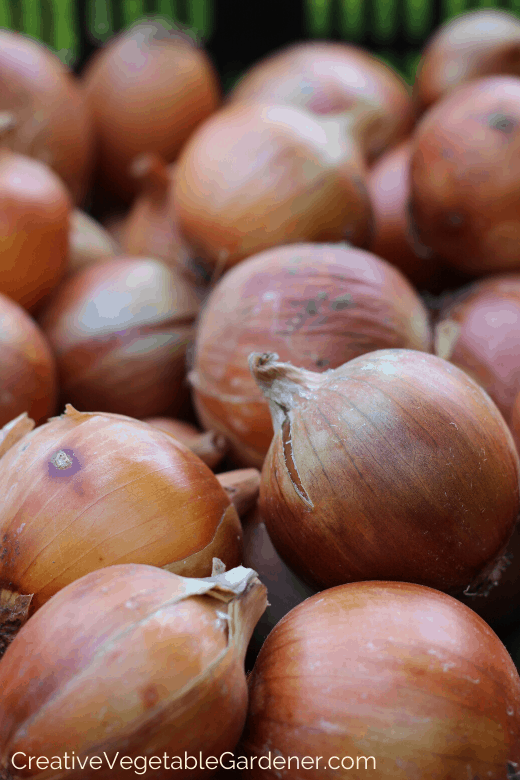
If you want to keep your onions for many months you should choose a storage variety. This is the majority of the onions I grow in my garden. Depending on how you prepare and store them you can expect them to last from 3-6 months or more.
Finding storage varieties can sometimes be a challenge when you don’t start your own seeds, but you may have luck finding storage variety plants at your local farmers market or nursery. I’ll share some options for ordering online below.
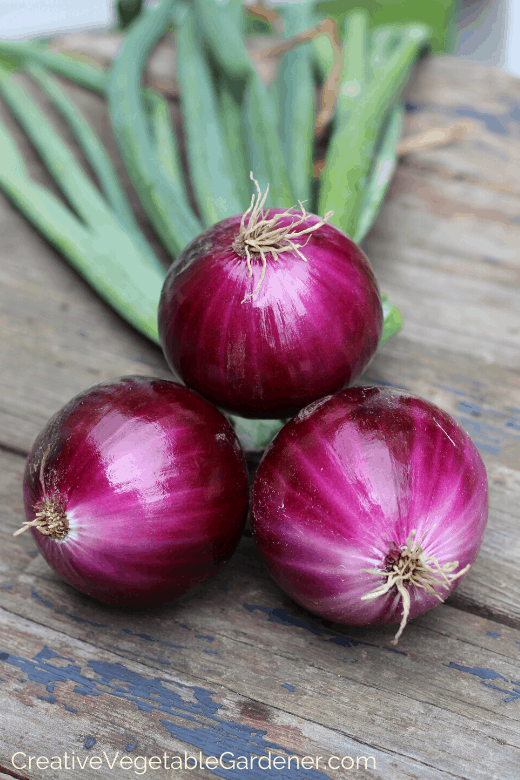
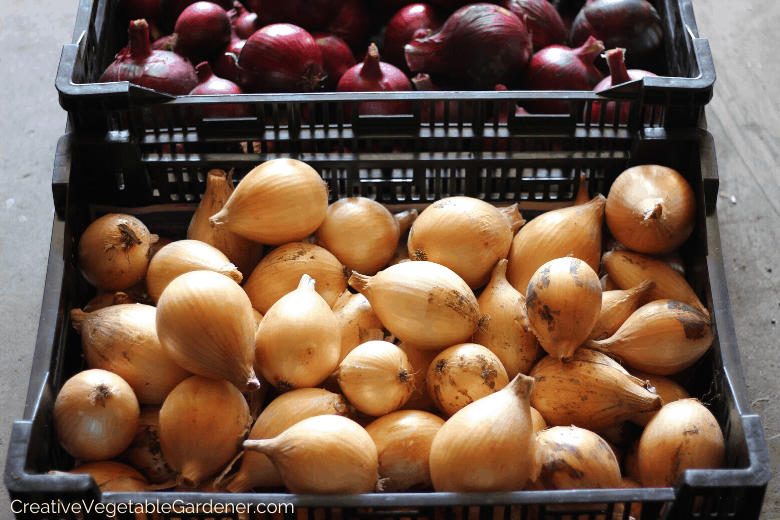
Step 3: Choose Your Color
There are three colors of onions – red, white, and yellow. The differences between the colors are more connected to the varieties than the actual color.
Some store better than others, some are mild, and some more potent. Read the variety descriptions to aid in your decision-making.
I encourage you to plant a mixture of different colors and varieties so you can find your favorites. In my garden I tend to plant about 2/3 yellow onions and 1/3 red onions.
Step 4: Select Your Varieties
I’ve grown a lot of wonderful onion varieties over the years! And, each year I trial a few new ones. I definitely have my favorites, which I’ve collected in the lists below.
Remember, I live in a northern climate, so the varieties I’m recommending are best for those gardens.
Other ways to find varieties that perform well in your region are to talk to fellow gardening friends, chat up local farmers at the Saturday market, and visit a reliable nursery in your area.
Favorite onion varieties:
Fresh Red: Long Red Florence
Fresh Yellow: Ailsa Craig
Storage Red: Redwing, Red Carpet
Storage Yellow: New York Early, Patterson, Cortland
I order most of my garden seeds from Johnny’s Selected Seeds and High Mowing Seeds.
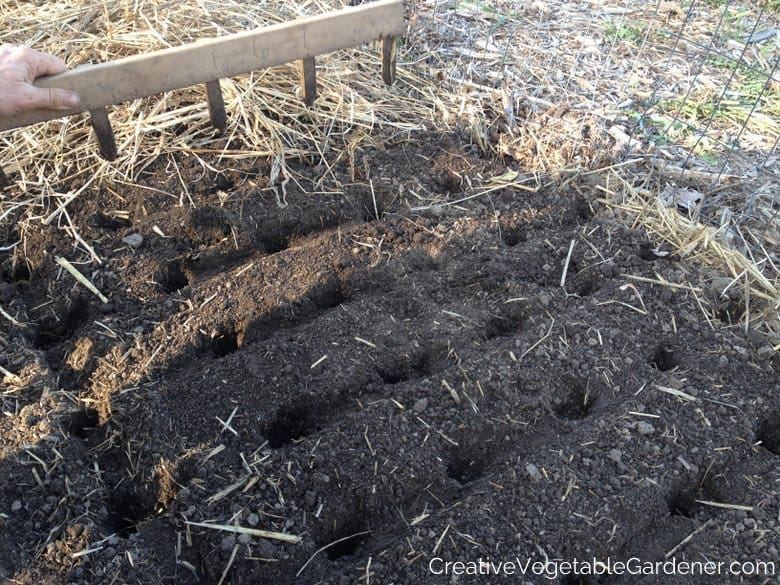
 My husband prepping the onion bed in our community garden plot.
#4: Prep Your Garden Beds for Planting
I’ve never tilled my garden in 25years and I don’t recommend it because it destroys the soil structure over time and also causes a lot of unnecessary work of setting up your garden every single spring.
Instead, I recommend you establish permanent beds and paths. This style layout will decrease the long term preparation and maintenance involved in your garden every season.
And as a bonus, with already established garden beds spring garden prep is a breeze!
Onions have shallow root systems, so they grow best in loose, crumbly soil that’s free of large chunks of debris like stones and soil clods.
Because their roots stay near the surface of the soil, you only really need to worry about the top 7-8 inches.
This means there’s no reason to dig deeply, flip over soil, or disturb your soil too violently. If you have clay soil like me, you can use a hard rake to loosen and break up the top few inches of soil before planting your onions.
One of my new favorite tools (I bought it for myself for my birthday a few years back!) is the broadfork. It’s great for heavy soils like mine because it allows me to lift and aerate the soil (kind of like fluffing it) without having to use a tiller. I use to prep all of my garden beds before planting.
I recommend mixing a balanced organic fertilizer into your soil before planting all seeds and plants. You can sprinkle it onto the soil with your hands and then use the rake to mix it into the top few inches of soil.

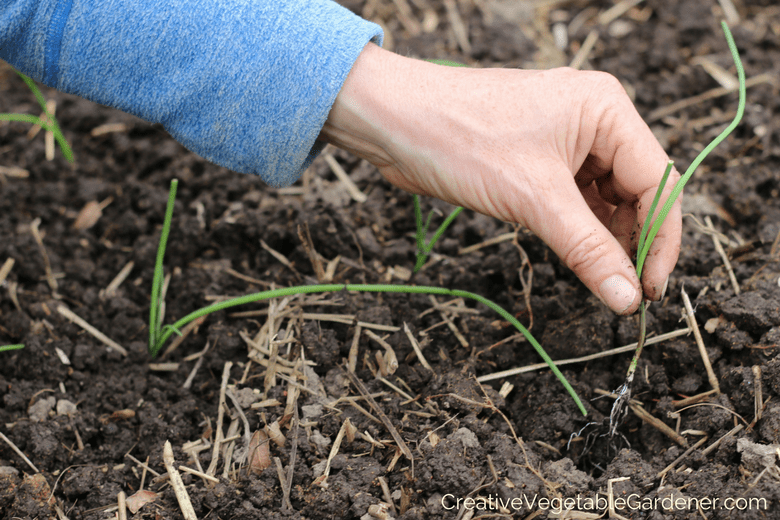
#5: Use Correct Spacing for the Plants
Onions can be planted pretty closely together – six inches on all sides. This means you’ll be able to fit a lot of onions in a small space. I usually fit my 500 or so onions in two to three garden beds.
For planting, we use a handmade dibbler that has prongs spaced six inches apart. (See photo below.) It creates our planting holes for us so all we have to do is place the transplant into the hole and cover it with soil.
Planting a lot of onions can be a bit tedious since they’re so small. Using a dibbler really speeds up the process. It’s also handy for garlic planting since they’re also spaced at six inches apart.
If you don’t want to make your own you can purchase a dibbler like this which will also double as a flower bulb planter. (I plant a lot of those, too!)
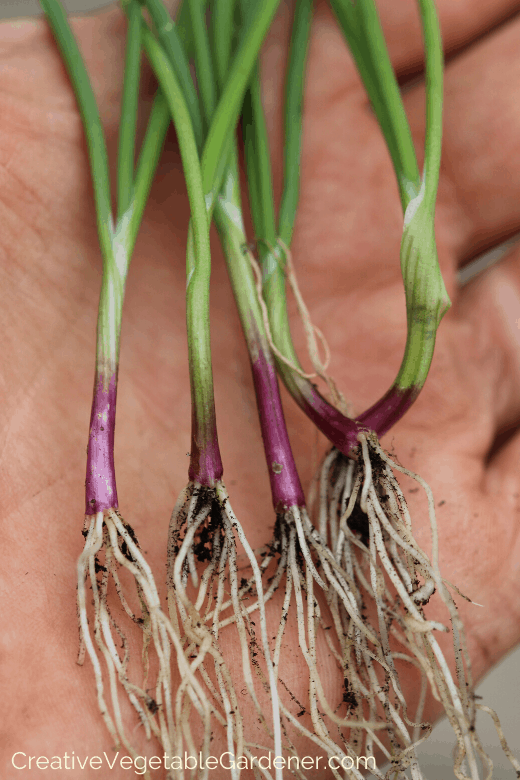
Plant your onions one inch deep. If you haven’t been regularly trimming them you can cut off the top five inches of the plant so it doesn’t dry out while the roots are getting established.
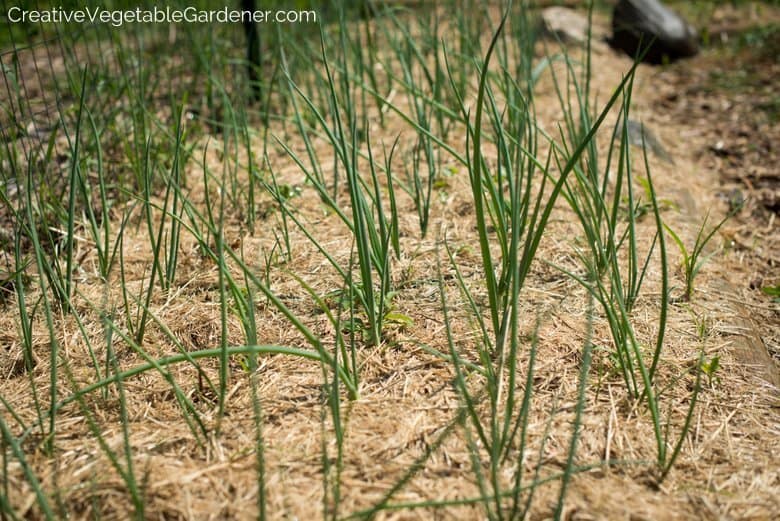
#6: Give Your Onions What They Need
How well your onions will ultimately grow is the result of temperature, soil nutrients, soil moisture, and competition. Until the plant receives its critical amount of daylight to start forming a bulb it will be focusing on growing its leaves.
#1 Need – Water!
Because onions are so shallow rooted they need frequent watering. Try to keep the top 3-4 inches of soil moist. Remember that after planting new transplants you’ll need to give them some extra water while their root systems get established.
Depending on the spring rains and weather I try to water new transplants every 1-2 days for the first week or so.
In general, most garden vegetables need one inch of water per week. More on watering your vegetable garden.
I’ve made the mistake of underwatering my onions in the past and they didn’t produce as well as I had hoped. Now I make sure to give them plenty of water.
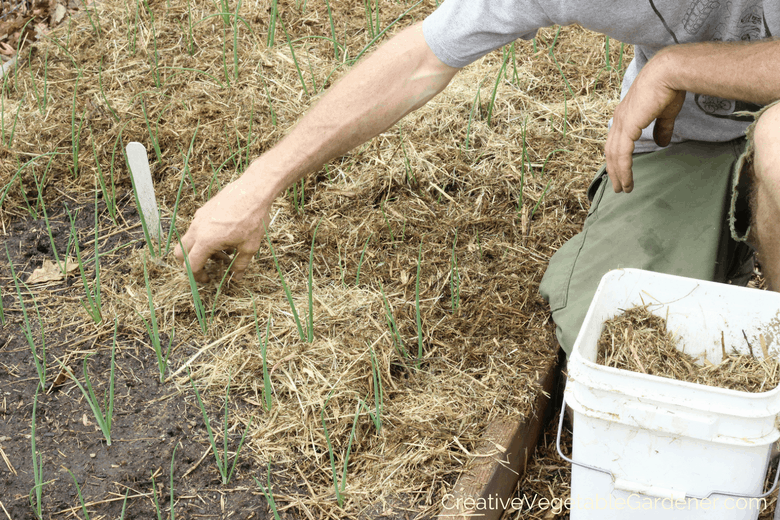
#2 Need – Weed-Free Existence
Onions don’t compete well with weeds. Try to keep your onions beds as clean as possible and you’ll be rewarded with a stellar harvest.
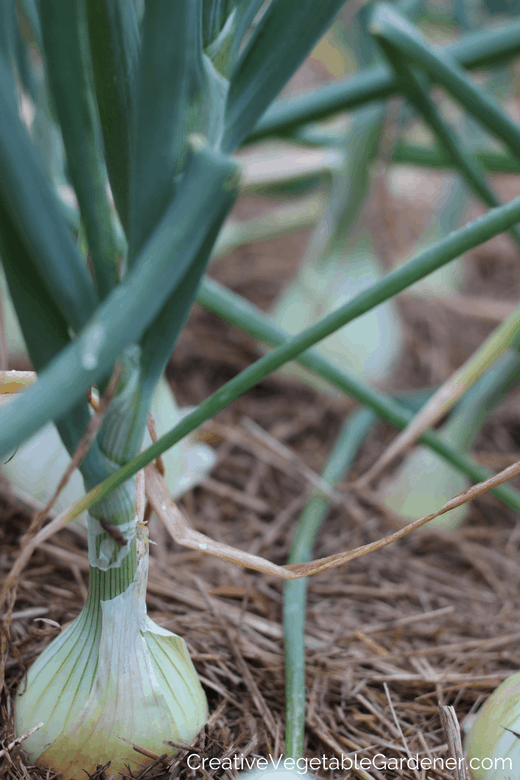
I hate weeding and try to avoid it at all costs. That’s why my garden is always covered in a thick layer of mulch. It’s best to get your onions mulched as soon as possible after planting.
It can be difficult to get the mulch around the small onion transplants. I find it easier to wait a couple of weeks until they get bigger and then mulch with a layer of marsh hay. You can also use straw, grass clippings, or leaves.
An added bonus of mulch is that it traps in soil moisture so you’ll need to water less and the soil around your onions won’t dry out as quickly.
Mulch your onions with hay to keep down the weeds and trap in moisture.
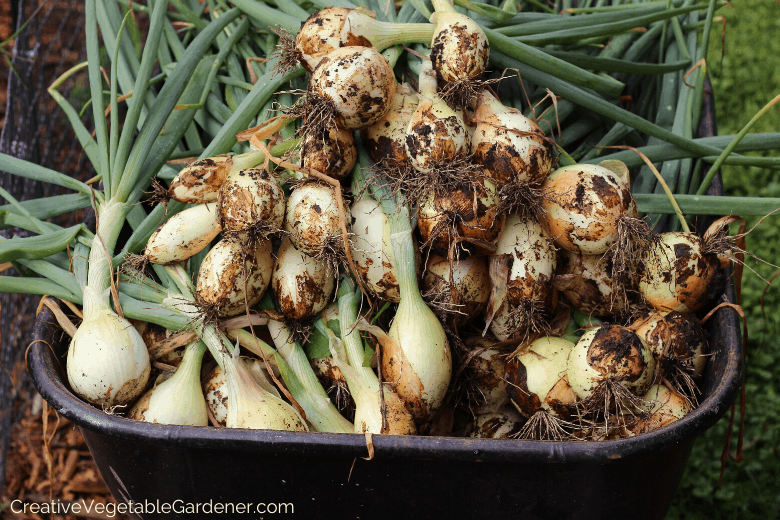
#7: Know When to Harvest
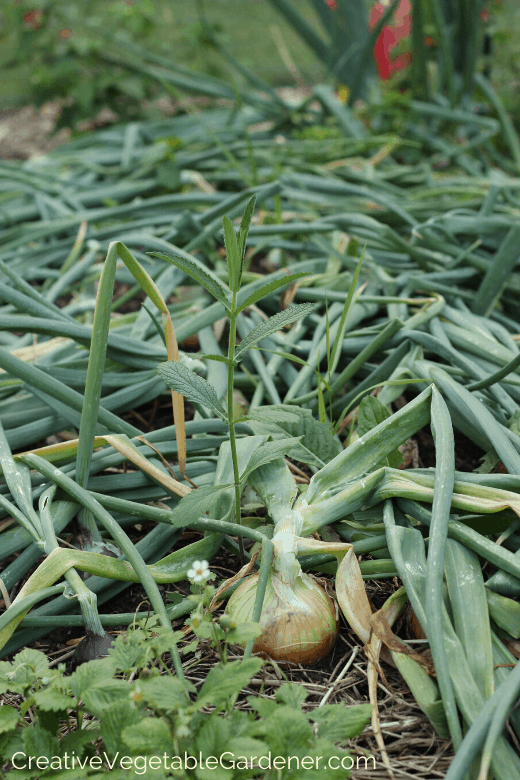
In late June to early July you’ll start to notice your onion tops falling over. Don’t be alarmed! This is part of their natural process and an indication that the bulbs have stopped growing and are ready for fresh eating or curing.
Harvest fresh onions when about 25% of the tops have fallen over and storage onions when 80% of the tops have fallen. If you harvest storage onions too early they’re more likely to rot in storage.
But, don’t leave them in the ground for weeks beyond when they’re ready to harvest. Get them harvested and into the curing process in a timely manner.
Plus, the open garden space where your onions once lived is the perfect spot for planting fall vegetables.
You can start eating your fresh onions right away – yum! I still cure mine for a bit in the garage, but they’re ready to eat the evening of your harvest day.
#8: Prepare Them for Storage
If you’ve grown a small amount of fresh onions and plan on eating them in the next month or so, you don’t have to worry about curing them. Just bring them in the house and start using them in your favorite recipes.
Storage onions require more of a curing process to help you successfully keep them over the winter. I actually love this part of onion growing because I feel so rich in onions when I’m lining them up in my garage.
It’s fun to think about all of the dishes I’ll be using them in throughout the winter.
Ideally, onions are cured at 80-90 degrees and low humidity for several weeks. The temperatures where I live in Wisconsin are generally in the 80 degree range in July, when I’m harvesting and curing my onions.
But, the humidity can be as thick as soup. Still, I’ve had no problems with curing my storage onions. Don’t be too worried about the humidty, there’s not much you can do to control it.
Cure your onions out of direct sunlight. At my old house I spread them out on my east-facing covered porch. Now I have a garage, so all of the onions go straight in there.
It’s best to provide them with some air circulation, so spreading them out on old screens set atop sawhorses is one option. Another option is using your metal seed starting rack. After seed starting season is over I move my metal rack into the garage and use it to cure my onions.
Don’t cut the leaves off the onions until after they’re cured. I like to bend mine at the neck when placing them on the curing rack to seal off the bulb from moisture.
A properly cured onion has a dry outer skin and a dry neck (the part of the plant where the bulb meets the leaves.)
You can check out my article on how to store garden onions or watch the video below to see exactly how I harvest and cure my onions for storage.
Onions are a great addition to your vegetable garden, especially if you’re a gardener who loves to cook! They can be a little tricky to grow.
So if you’ve tried to grow onions in the past and have been disappointed, I encourage you to put them back on your plan for this year’s garden.
If you incorporate these eight best practices into your onion planting and growing routine this season you should have a much more successful crop!
Want to read more about growing vegetables?
.


Comments
I know you say that you place your onion plants 6 inches apart, but your dibble looks to have points 4 inches apart as I figure out by placing my hand on a ruler like yours on the dibble. Do you place onions 4 inches apart in rows that are 6 inches apart? …or is your hand just much larger than mine?
I like the dibble and want to make one, just brought up short by this inconsistency.
Do you have any suggestions for growing in a raised bed, using the square foot gardening method. I want to add onions to my garden for the first time.
Hi Louise- I don’t use the Square Foot Gardening method in my garden, so I’d suggest getting the book which explains all the details. I can tell you that onions should be planted about 6 inches apart on all sides. Good luck!
I’m just starting to garden, so I apologize if my questions seem silly. Are transplants just seeds you started in a sunny window in Feb? And, are green onions just ones that are harvested before the form a bulb?
Thanks!
Hi Brianna- Yes, transplants are seeds either your or a farmer started in the winter. I don’t recommend growing your seedlings in front of a window because they need overhead light. If you want to grow green onions you’ll get the best results by buying seed meant for this purpose.
Hi Megan, I was wondering what type of hay you use for mulching? Thanks for your great blog!
Hi Penny – Thanks for reading! I use marsh hay. Be careful of your source. Make sure you’re not buying from someone who hayed a weedy field. Oat straw will work well most of the time, too. The oats may sprout but they usually die pretty quickly.
Hi, I would like to know how to tell my onions are ready to harvest and do you ever grow garlic in the same soils as your onions or with your onions I should say? I live in Mississippi so of course we have a warmer climate and a lot of spring rain. Thank you..
Hi Tamara- Your onions are ready to harvest when the greens flop over. I wait until this happens to the entire bed. I grow garlic in a different bed since I plant it in the fall. I don’t plant my onions until April.
What do you mean exactly “harvest when the greens flop over”? The whole plant? So what about when the flower bud stem curls?
Daphne- You shouldn’t have any flowers on first year onions. If you do, it’s probably because you’ve planted onion sets. They’re technically second year onions, so they sometimes go to flower. I’ve had the best luck growing my own onions from seed. When I do that I don’t get any flowers and all of the green leaves flop over when it’s time to harvest.
Megan,
I live in WI too and tried seed starting onions this year in my basement. I have the standard flourescent light fixtures over my plants. Many of my starts are doing great but for some reason my onions are not. They germinated just fine but after a few weeks the tops of them start browning and withering away and then eventually the whole plant. I can’t tell if i am underwatering or lights are too close or too far away (i try to keep 2-3 inches above plants) or maybe i should be trimming the onions where they are turning brown at the top? Any suggestions you have or tips for starting onion seeds indoors would be appreciated!
Also, have you ever tried seeding onions in ground in fall and overwintering for an early spring harvest? I saw someone did that at my community garden.
Thanks!
Hi Brian- Thanks for stopping by! It sounds like you were possibly overwatering your onions. Do you have drainage holes in the bottom of whatever pots or flats they’re in? You should let the soil dry out about 80% before watering again. Your lights sound like they’re in a good position. I keep mine very close as well. I’ve never seeded onions in the fall. It sounds like a fun experiment!
[…] that peaked my interest. As I said above, Redwing is one of my favorite onions to grow. So, how could I resist a new and improved version? Answer: I couldn’t. I quickly added Red […]
How do you store your onions after harvest?
How long are your dibbler stakes?
Great question – about 5 inches!
Hi! I’m new to most gardening (especially veggies!) I was wondering how do you keep or store your onions since you grow so many? Thanks for your posts!!
Great question! I don’t have a post about this yet, but I do have one about garlic. Onions are similar, but I spread them out on a rack instead of hanging them. https://www.creativevegetablegardener.com/harvest-garlic/
I have started my seeds in 3″ peat pots. Will I need to remove them from the pots and put them in bigger pots? They are broccoli, cabbage and cauliflower for now. Tomatoes and peppers plus squash later. Zone five and I started them on February 22, 17. Thank you for your reply.
Hi John- It depends on what quality soil you used. If you see them starting to turn yellow you might need to replace the soil, although you don’t necessarily need to give them more room. I grow my brassicas in 4 packs or 6 packs, which are pretty small container sizes.
Dear Megan,
I wonder if dried bracken could be used to mulsh onions in place of marsh or oat straw?
Sylvia
Hi Sylvia- I don’t see why not. Plenty of people use dried leave for mulching. Try it out and let me know how it goes!
How big are the prongs on your dribbler, ( width ) and how deep do you plant your onions. Thanks !!
Width is about half an inch. I plant my onions a few inches deep. I like to get them down into the soil and make sure all of the white and some of the green is covered up. It’s fine to plant them deep.
I have trouble getting large onions. Most are medium to small. A few will be large. What would be keeping me from getting large onions.
Schere- Are you using your own plants or buying from a nursery? Keeping them weeded and watered are two big things you can do. I also have better luck with growing my own seeds at home or buying transplants.
Do I have to worry about root maggots and if yes how do I deal with not getting them. I read wood ash works??
Working at a small town garden center, customers often share “what works for me” ideas. One is “half-mooning” onions. OK, I know what you are thinking – so did I until my customer gardener explained. When onions start to bulb up, using your finger, move about 1 inch wide band of soil away from around 1/2 of the bulb (thus “half-mooning”), all the way to the top of the roots. After a week or so, do the same to the opposite side. This gives the bulb room to grow larger without needing to push soil out of its way, especially if growing in heavy clay soil. His idea sounded pretty silly to me but with my heavy clay garden soil and usually puny onions, it was worth a try. It WORKED! Now, if you grow 500 onions, this could be quite a chore, but if not, it’s worth a try…even if you “half-moon” only half 🙂
That would be an interesting experiment, RaNae. Thanks for sharing!
Thanks for your information on fall gardening and onions I found it very helpful!
I did something different with my onions this year. I used onion sets as opposed to seeds. What a big mistake. My onions were a disaster this year. I know a lot of people love starting from sets, but for me I’ll stick with the seeds. I do far better.
Mike- I agree! I’ve used both and I get much better onions when starting my own seeds. Not all experiments turn out well in the garden, but we always learn something from them!
I bought sets to use as companion plants and I started several hundred seed a few months ago. When the sets start to grow a flower can I pull and eat them? Also, if I let them flower, can I save the seeds to start more next year?
I really enjoy learning from all of you on here. Thanks for sharing.
I grew up in Vidalia onion country, and live on the Georgia coast, so I feel like it’s a near-sin to not grow onions! 😀 I’m new to gardening and put my first batch of yellows in the ground last fall. We are coming up on harvest season and I can’t wait! I use onions in nearly every dish, and I just wish there was a way to store them longterm in zone 9A. I have yet to come across a solid plan other than chopping/freezing.
This is a great article. I have never been overly successful with onions. We live on the Canadian border in a little town deemed “the icebox of the nation ” it is mid April and it is still snowing and dipping below 0*. I am actually planning on building a greenhouse so I can be more versatile in my plant selection. Any recommendations on an onion that may be a good beginners onion. Our soil will be frozen solid and covered in snow for about 3 more weeks. Than once the snow is gone it takes a while till I can work the soil because our frost goes down 5-8 ft depending on the snow pack and severity of the winter. I typically plant in the garden in the first 2 weeks of June. I plant a lot of my plants in pots and drag them in and out of the heated garage every day until mid June. Can I grow a decent onion in a large pot? I would LOVE to never buy another onion but am daunted!
Thank you so much for the advice! We just put in raised garden boxes and I’m looking forward to having a garden. I’ve always been intimidated at the thought of growing onions, but your advice has made me think I will give it a try!
Some told me not to water too much because my onion rot with moist soil.
Do you wait till the tops turn brown..when do you pull them
I harvest them when all of the tops flop over.
I’ve been trying to go no-till for a few years but haven’t managed yet. I love the idea of using a broadfork to loosen soil but you said you can dig the first several inches. Isn’t that tilling? I mean, the top few inches IS the soil bed! I have raised beds so the soil is already loose and protected.
Hi Connie-
With a broadfork you’re not really digging, you’re more loosening the soil and aerating it. Unlike with tilling where you’re mixing it all up as the tiller turns and turns. Try it some time!
I’m going to try starting onions from seeds this year and this post will be very helpful. Hubby built me a 6×10 greenhouse in the front (south-facing) yard to use for seed starts this year and I’m wondering if I can use that to cure my onions later on. If I put a tarp or blanket on the front of the greenhouse to block sunlight, would that be okay? (And for potatoes later on, too.)
Hi Connie- I think it’s worth a try to hang a tarp and then monitor how much direct light they’re getting, if any. Keep me posted!
You said “If you haven’t been regularly trimming them you can cut off the top five inches of the plant”. Does that mean I should be trimming back my indoor onion sprouts until they are planted outdoors?
Yes, you can keep trimming until they go into the ground. I just gave mine a haircut yesterday for the second time.