
This post contains affiliate links.
If you love the excitement of starting seeds but feel like you have mixed success from year to year, you might be making some of these common mistakes of seed starting.
The number one goal of starting your own plants is to produce healthy and vigorous seedlings that will survive the trials and tribulations of the outdoors once they’re planted in the garden.
Focusing on a few of the most important factors that go into growing great plants will help you improve your seed starting success by leaps and bounds.
And that means it will be a lot more fun – which is one of the main reasons to start your own seeds!
At the end of this post, you can also watch a video where I expand a bit on some of these mistakes.
10 Seed Starting Mistakes to Avoid This Year
#1 – Know which seeds should be started indoors.
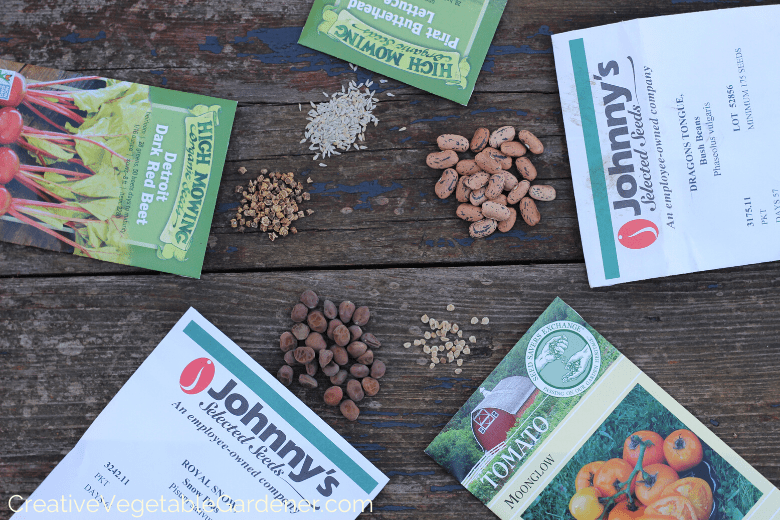
These are two very different methods of planting vegetables: with a seed straight into the garden outside (direct seeded) or with a plant that was started indoors by you or a farmer or nursery (transplanted). Some vegetables do best when they’re planted in the garden as seeds, and some fare better as plants.
You don’t want to waste time and resources starting seeds that can easily be planted directly in the garden when spring rolls around.
You should be focusing your efforts on the vegetables that are given a boost by being grown indoors before they make the trek outside to the garden.
Gardeners who live in colder climates with shorter seasons often start their plants inside to give them a head start. This ensures they’ll have enough time to grow to full size once they’re outside in the garden. Peppers, eggplant, and tomatoes fall into this category.
Some vegetable seeds, like peppers, herbs, and many flowers, take extra care to germinate.
It would be difficult to give them the attention they need to germinate well in the changing conditions of the garden, so it’s easier to either start the seeds inside or buy plants.
In general, the following vegetables perform best when started indoors:
basil, broccoli, brussels sprouts, cabbage, cauliflower, celery, collards, eggplant, kale, leeks, onion, peppers, scallions, shallots, tomatillos, tomatoes
Most perennial herbs are also best for transplanting. Because you’ll only need one or two of each herb, and they should come back year after year, I usually suggest buying herb plants instead of starting your own.
Perennial herbs are garlic chives, marjoram, mint, onion chives, oregano, rosemary (in milder climates), sage, tarragon, and thyme. I also purchase a few parsley (an annual) seedlings in the spring instead of starting my own.
There are a few vegetables that do just fine whether they’re direct-seeded or transplanted, so it’s ultimately your choice.
Vegetables that can be planted by seed or started indoors as plants: bok choy, cucumber, fennel, kohlrabi, lettuce (head), melons, okra, pumpkins, summer squash, swiss chard, winter squash.

#2 – Start your seeds at the right time.
I’m in a Facebook group for Wisconsin gardeners and every year around seed starting time there are lots of questions from gardeners around the state about when they should start their seeds.
The range of answers if often confusing – everything from “I start all of my seeds on St. Patrick’s Day.” to “Just plant them all directly in the garden.”
Neither of these answers is completely correct, and there’s no one right answer – it all depends on where you live and in what zone your garden is located.
Here in zone 5, I start my onion and leek seeds at the end of February and continue to seed different vegetables throughout March and April.
The easiest way to figure out when to plant each vegetable, herb and flower indoors is to create your own personalized seed starting calendar based on your average last frost.
If you start plants too early they’ll get overgrown and unwieldy way before it’s time to transplant them into the garden (been there, done that). But, if you start them too late, they’ll be puny and weak at planting time and might not fare so well against weeds, insects, and diseases.
A planting calendar created for your garden zone will allow you to stay on track and start your seeds at the best time for your garden.
In my Masterclass, Super Easy Seed Starting, I include a seed starting calendar template that allows you to customize the dates based on your average last frost in spring. Check it out here.
Another option would be to do some internet research and see if you can find a calendar for your area through your local University Extension.
Always be careful of your sources of gardening information, make sure it’s a reputable one and if you can, check the dates you find against several different sources.

#3 – Don’t start your seeds in cheap potting soil.
The soil mix you plant your seeds in is one of the most important factors in your seedlings’ health. The nutrients in this mix are what will feed your plants and help them grow until the moment they go out into your garden.
One sign your mix is lower quality is when your plants start to turn yellow while still in their pots. This means they’ve used up the available nutrients in the mix.
When this happens your plants will continue to degrade in quality and due to their weakened state, they’ll be more susceptible to pests and diseases when you plant them in the garden.
You want your seedlings to remain a deep, dark green the entire time you’re caring for them in your home. This will ensure they’re at optimal health when it’s time to plant them.
Healthy seedlings are able to fight off weeds, pests, diseases and all of the other forces in the garden that threaten them.
I recommend spending more money and investing in a higher quality seed starting mix instead of buying cheap potting soil.
I’ve tried both and the difference between them is vast. This blog post explains what you should look for when shopping for soil.

#4 – Stop trying to grow seedlings in front of your window.
There’s no way around it – vegetable plants need overhead light. Think about your favorite local greenhouse where you go shopping for plants. Their selection always looks amazing, right? Next time you’re there on a shopping trip look above you.
What do you see? Glass or plastic is my guess. Their plants look so healthy and happy because they’re getting overhead light from lights inside the greenhouse and/or the sun.
When you try to grow your seedlings in front of a window they’re only getting light from one direction (the side), which means they’ll stretch out and grow tall and skinny while searching for more light.
This is the exact opposite of what you want your plants to look like. The most healthy plants are shorter and stockier, not stretched out tall. The best way to grow plants indoors is to assemble a DIY grow light rack.
It’s easier than you think and you’ll use it for many, many years! Get a tour of my set up and a list of supplies you’ll need here.
#5 – Know what conditions seeds need to germinate.
It can be extremely frustrating when you have trouble getting stubborn seeds to germinate. Some vegetables, like cucumbers, germinate pretty easily. Others, like peppers, can be incredibly tricky and require very specific conditions.
The best way to ensure germination success is to make sure you’re giving each type of seed what it needs.
Soil Temperature: The different vegetables you’re growing prefer various soil temperatures in order to germinate.
In general, spring season vegetables like broccoli and lettuce germinate better with cooler soil temperatures and hotter weather plants like tomatoes and peppers like warmer soil temperatures.
At their optimal temperature seeds germinate quickly and uniformly. What I find the most challenging is when seeds like peppers need very warm soil conditions.
My house is on the cooler side so I provide supplemental heating in the form of a heat mat. You can read more about heat mats in this article about how to germinate seeds and more specifically how to germinate peppers in this article about starting peppers indoors.
Moisture: Seeds need to remain consistently moist, but not soaking wet, during the germination period. You can use a germination chamber to ensure they don’t dry out.
It’s a fancy name for a very simple thing you can make out of a plastic bag. Read more about how to use a germination chamber here.
Air: Seeds need oxygen to grow and produce carbon dioxide as a byproduct. The CO2 needs to move away from the seed during this process, so make sure there’s some air circulation in the pots or cells. Don’t compact the soil by tamping it down heavily with your hands or the seeds might suffocate.
Light: Most seeds germinate best under dark conditions, which is why we cover the seeds with soil when we plant them. The exceptions are some types of flower seeds. Make sure you check the back of the seed packet when starting flower seeds to discover if they need light to help them germinate.
There are a few tricks around how to germinate seeds that can help you increase your success rate and avoid seed starting disappointments. You can read more about them in this post.

#6 – Don’t overwater.
How much you’ll need to water depends on the size of the cells or pots your plants are living in, the location of your seedling rack, and how big the plants have grown.
You’re watering to keep the soil moist, but not soggy.
Most people overwater their seedlings which can cause a host of problems. The most common issue is called “damping off”. This is when the plant rots where the stem meets the soil surface.
The plant just breaks off and dies. There’s nothing you can do to save the plant once this happens.
This is most likely a sign you’re watering too frequently.
You can let the soil dry out about 80% in between watering sessions. But, be careful not to ignore them so much that the soil becomes bone dry and your plants start to wilt. This will stress them out!
I use a bike water bottle or small watering can to water my seedlings when they’re in my house. Once they’re outside hardening off I use my hose.
And make sure whatever containers your seedlings are living in have drain holes! It’s imperative they’re not sitting in water.

#7– Position your lights at the right height.
Now that you’ve built your seed starting rack it’s important to adjust your lights so they’re within one inch of the tops of your seedlings at all times.
Most people put their lights too high and the seedlings get leggy (tall and stretched out) because they’re reaching for more light. You want stout plants with strong stems, taller isn’t necessarily better.
If you’re using standard fluorescent lights or LED lights over your plants they don’t get very hot to the touch. That means it’s okay if the tops of the plants touch the bulbs periodically as they grow taller.
But, some grow lights (including the one I use) emit a lot more heat. The bulbs are hot to the touch and I’ve noticed that if I let the plants grow into the bulbs they get a burn spot.
So I’m very careful to monitor them as they grow and raise the lights on a regular basis to prevent this from happening.
When you’re setting up your grow light rack make sure the lights are easily adjustable. You can hang them from chains and s-hooks which allows you to move them up and down as needed.
Read more about how to choose grow light for seed starting.

#8 – Don’t let two seedlings live in the same pot.
If you happen to have more than one seed germinate in a cell or pot, you’ll need to either move it or kill it. Two or more plants in a small cell fighting for space, light, and nutrients will result in stressed-out plants.
There are a few exceptions to this rule. Scallions are one of them, where you intentionally want more than one plant, and some people like to grow their basil in clumps instead of single stems.
If you have plenty of a particular seedling, don’t feel bad about snipping off the extras with a pair of scissors. If you want to save them, you’ll have to move the extras into their own pots or cells.
F I filmed a whole video about how to cull and replant your seedlings in my how-to video series, Super Easy Seed Starting. Check it out here.

#9 – Keep records so you don’t waste time and money.
If you’re like me, there’s no way you can remember how many pepper seeds you start from year to year. I have way too many other things in my brain!
If you keep simple records from year to year you don’t have to recreate the whole process over and over again. That means less time and money wasted.
There’s no point in growing way more plants than you can use and give away to friends.
In the photo above you can see my simple record sheet. I grabbed an extra binder I had in my office, printed out a few copies, and put them in the binder. Each year I add the new season of seed starting to the front of the binder.
Every time I start seeds I write down the date, variety and how many I planted. This helps me start to refine my process by giving me a starting point each year so I don’t have to start from scratch.
Each seed starting season, you’ll be able to use this record to help you decide what to start and when.
You can tweak the amounts, varieties, and push the dates forward or backward depending on your experience from the year before.
This will save a lot of time and mental energy from year to year because you won’t have to recreate the whole process every season.
F Here’s a PDF of my Seed Starting Record Template. Feel free to print out some copies to use this year!

#10 – Not hardening off your seedlings.
Once spring arrives, (yahoo!!) it will be time to start watching the weather and planning when to plant your seedlings outside in the garden. But, before you do, you need to harden them off.
You absolutely cannot take your seedlings directly from your grow light rack, walk outside, and plant them in the soil of your garden bed. They will likely not survive!
The environment of your house- no rain, no wind, no strong sunlight, no pests or disease – has created coddled and delicate seedlings.
You need to toughen those babies up before you let them fly the coop and ask them to make it on their own in the real world.
You cannot skip the step of hardening them off. That’s right, they need to have a thicker skin to make it in this cruel, cruel world.
Hardening off simply means they need to gradually spend more and more time outside over the course of about a week so they can get used to the elements.
This should be done gradually so they don’t get sunburned or wind-whipped.
I usually set up a hardening off area on the eastern side of my house so the plants get exposed to the softer morning lights and are protected from the stronger afternoon sun rays.
You’ll also want to watch the nighttime temperatures and make sure you’re not leaving plants that aren’t frost tolerant outside when there is a frost in the forecast.
You’ll freeze their little leaves right off!
Before transferring your plants into your garden make sure they’ve spent at least two days out in full sun and two full nights outside. But, remember, they’re fragile, so make it a gradual transition!

As you’ve learned in this post, starting seeds is one part of the process (the easy part?!), and taking care of them for weeks or months before they’re ready to go into the ground is a whole other set of tasks.
If you want your plants to thrive once you put them in the garden and have the fortitude to fend off pests and diseases then you need to make sure you take care of them correctly after they’ve germinated in your house.
If you’re feeling overwhelmed by seed starting or would like some extra guidance to ensure your success, check out my how-to video series, Super Easy Seed Starting Masterclass. I’ll help you skip over the frustrating and costly mistakes and grow high-quality seedlings that will lead to colorful and abundant harvests all season long! Read more about it here.
Want to read more about seed starting?


Comments
[…] 5 Common Mistakes of Seed Starting […]